
Add DX Express tracking account
A tracking account is a dedicated account that helps users, businesses, or customers to monitor and manage the status of shipments in real-time. This account provides access to tracking information for parcels and freight moving through logistics network or with specific carriers.
In SAPIENT, you can add tracking accounts for DX Express to enhance visibility, improving customer interactions, and streamlining logistics operations for DX.
ImportantPrior to adding a DX tracking account, make sure you have completed the following prerequisites:
- Enabled the label integration with DX Express.
- Enabled the tracking integration with DX Express.
- Set up yourtracking webhook. For more information on how to set up a tracking webhook, refer to the Create tracking webhook section. This is a one-time activity, you do not have to do this every time you add a tracking account.
Also, if you already have an account with DX Express that is actively being used, and if you wish to receive tracking via Intersoft, you need to request a new account number in order to integrate with Intersoft. This request can be made to your DX account manager. Make sure this is done before you can set up a tracking account.
To add a tracking account for DX Express in SAPIENT, follow the steps as explained in the following procedure.
- On the SAPIENT Home page, in the left navigation panel, select API > Webhooks. On the page that opens, select the Tracking Accounts tab.
Accessing tracking accounts
- In the Tracking Accounts page that opens, select
 .
.
Accessing option to add tracking account
- On the Add Tracking account page that appears, in the DETAILS block, enter the necessary information as explained in the following table.
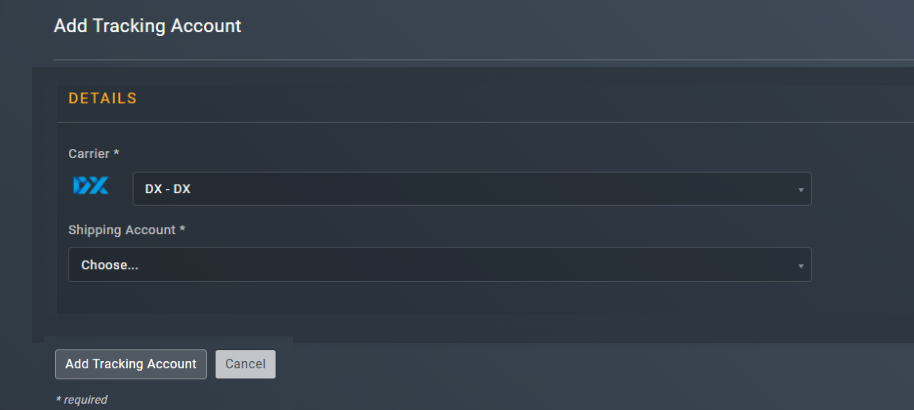
Adding tracking account
| Element | Description |
|---|---|
| Carrier* | From the dropdown menu, select DX as your carrier option. |
| Shipping Account* | From the dropdown menu, select the shipping account for which you want to receive tracking. You can also select the All Shipping Accounts option to add this tracking account for all existing accounts. |
- After entering all the necessary information, select
 .
.
Once done, the DX Express tracking account is added successfully and appears in the Tracking Accounts list. You can now receive the tracking information on your shipments.
Updated 11 days ago