
Add Royal Mail shipping account
A shipping account is a specific account set up with a shipping carrier or logistics provider that enables businesses to manage shipping activities.
In SAPIENT, you can create a Royal Mail shipping account by selecting your desired shipping location, entering the corresponding account and carrier details, and then adding the account to the system.
ImportantBefore you can set up a shipping account, you must ensure you haveenabled the label integration with Royal Mail.
To add a shipping account for Royal Mail in SAPIENT, follow the instructions as explained in the following procedure.
- Log in to the SAPIENT platform using your credentials.
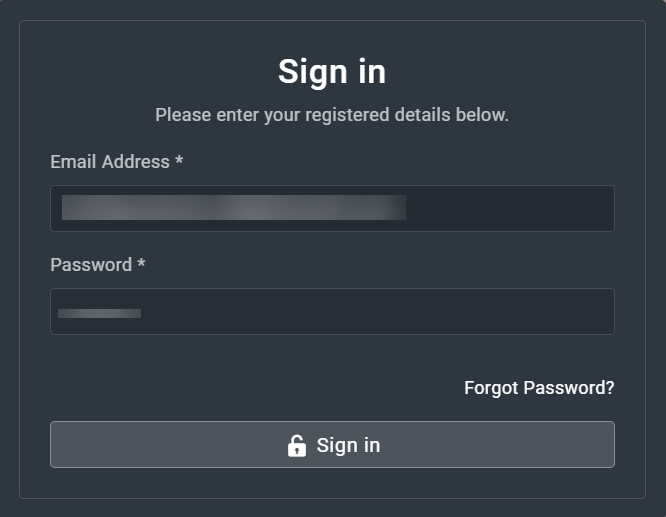
Logging into SAPIENT
- On the Home page that opens, in the left navigation panel, select Shipping Accounts.
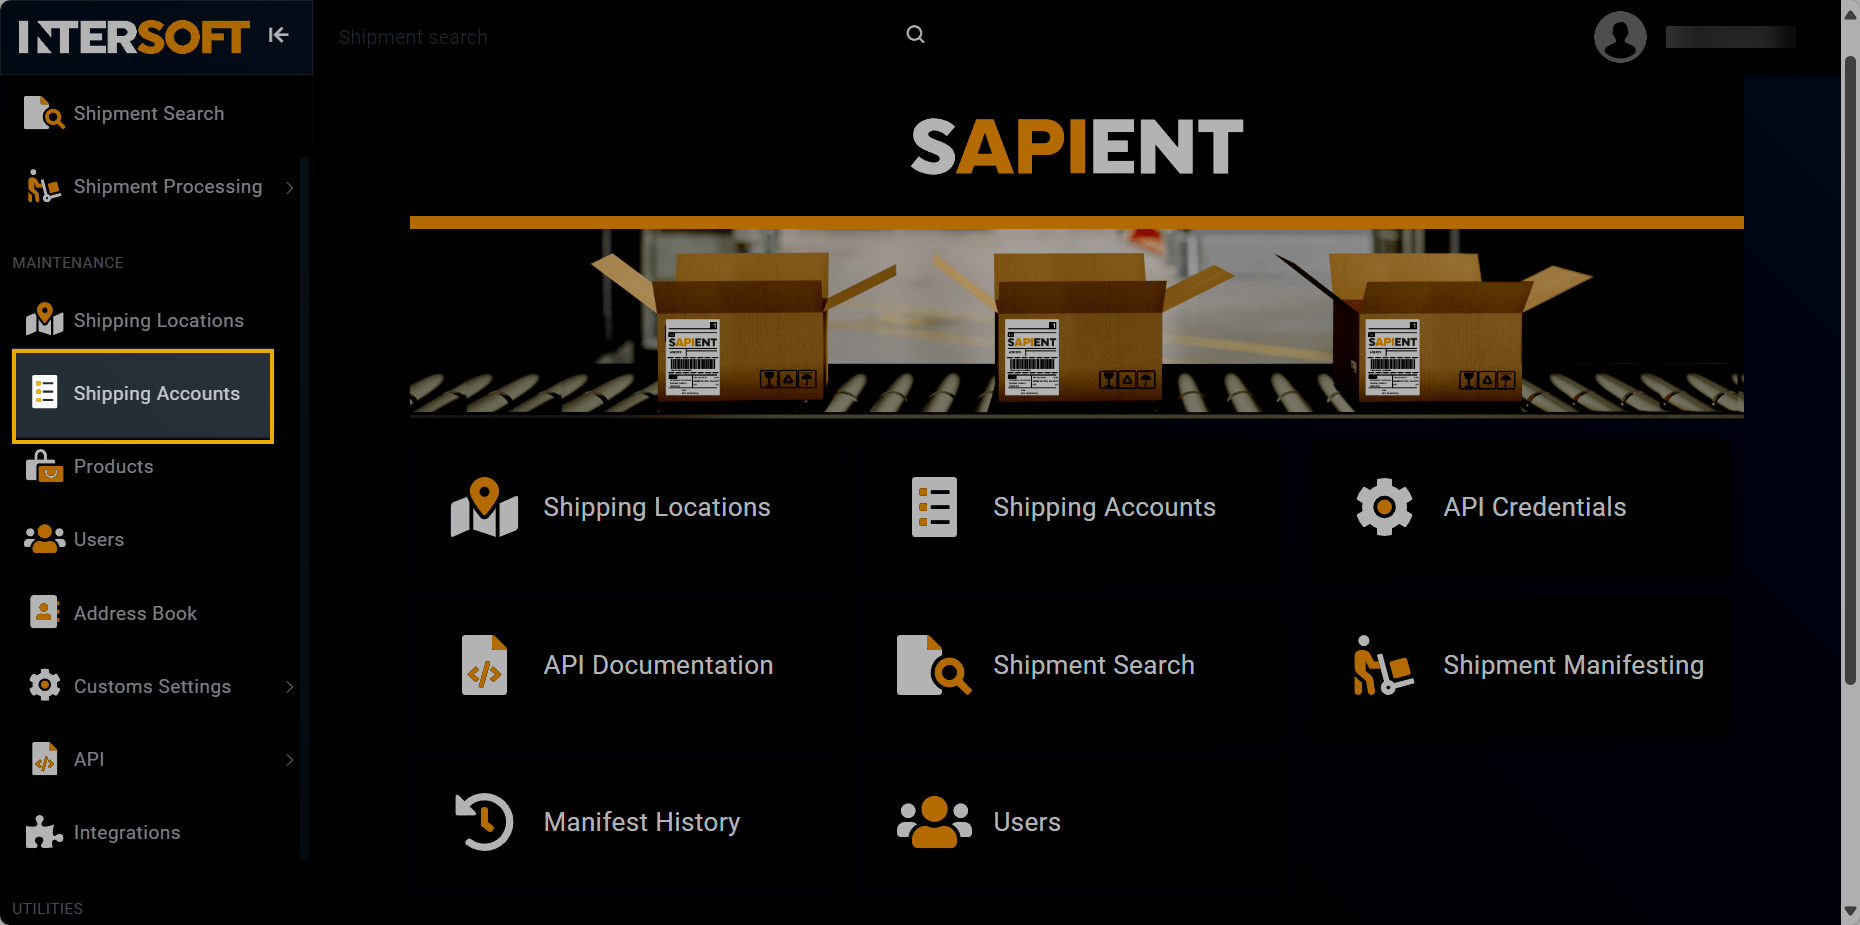
Accessing shipping accounts
- On the Shipping Accounts page that opens, select .

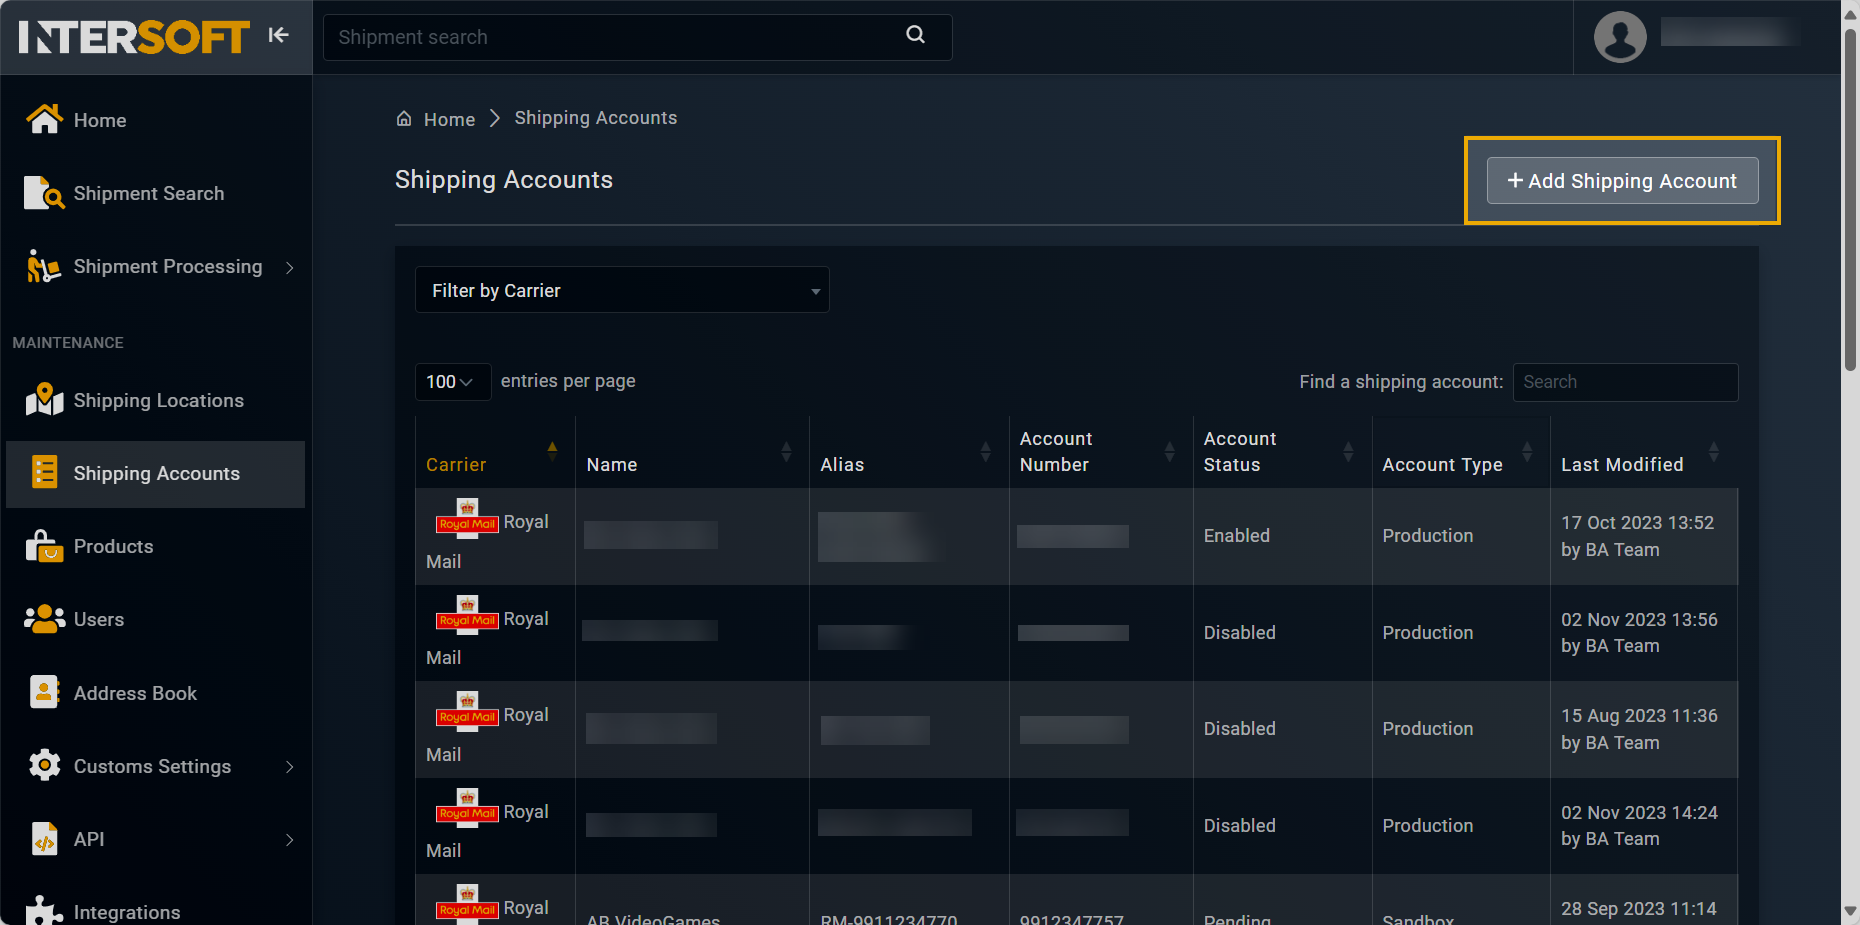
Selecting option to add shipping account
- On the Add Shipping Account form that appears, in the ACCOUNT DETAILS block, fill in the necessary information as described in the following table.
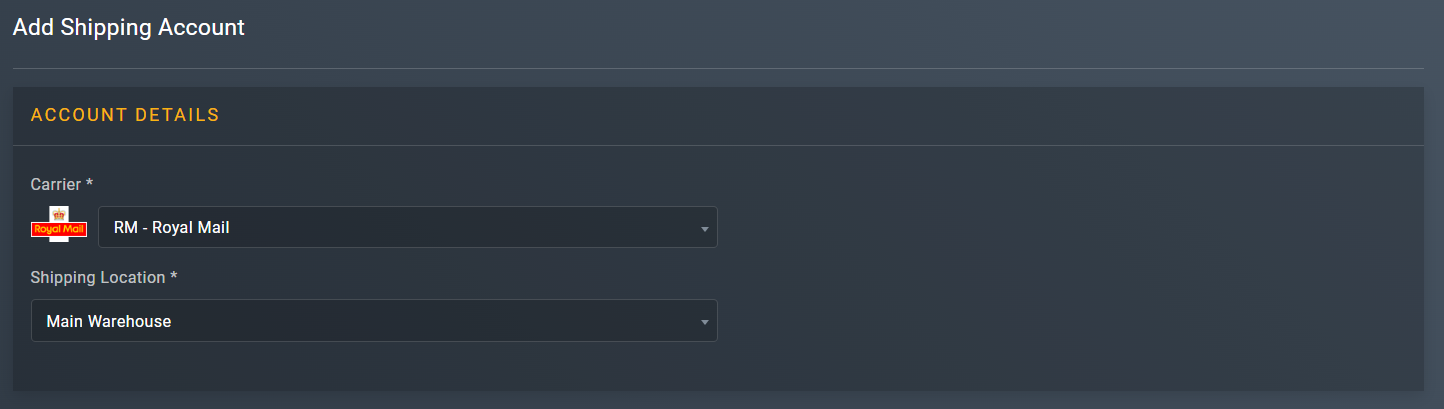
Entering account details
| Element | Description |
|---|---|
| Carrier* | From the dropdown list, select RM - Royal Mail. |
| Shipping Location* | From the dropdown menu, select the location that you want to assign to the shipping account you are creating. |
- In the SHIPPING ACCOUNT block, enter the necessary information as explained in the following table.
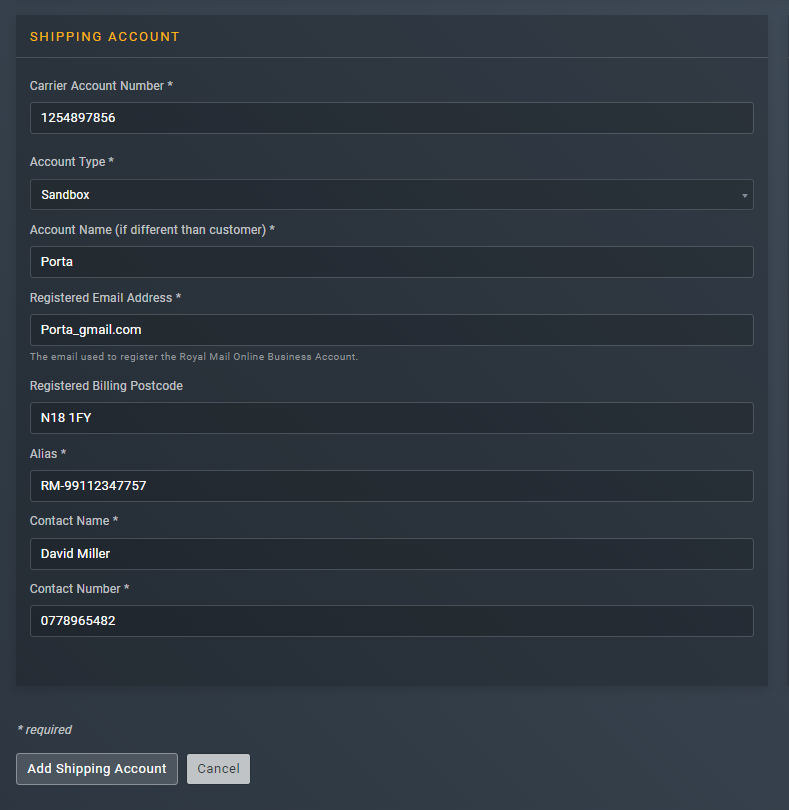
Specifying shipping account details
| Element | Description |
|---|---|
| Carrier Account Number* | Enter a ten digit account number. This must be a ten digit number. If your account number is shorter than this, then you need to add the required amount of zero's at the beginning of the number to ensure it is ten digits long. The format of the account number must be compliant with the carrier you have selected. If your account number does not meet the requirements, you may need to add the required amount of zero's at the beginning of the number to ensure it is ten digit long. |
| Account Type* | From the dropdown menu, select one of the following account types that you want to set up for the the shipping account you are adding: • Production: a live environment where the final version of the application is deployed and made available to the users. • Sandbox: a testing environment that mimics the Production environment but is isolated from it. The sandbox environment is primarily used for development and testing purposes.
|
| Account Name (if different than customer)* | Enter the name of the account you are adding. |
| Registered Email Address* | Enter the email address that was used to register the Royal Mail online business account (OBA). For more information on OBA, refer to the Set up Royal Mail OBA account section. |
| Registered Billing Postcode | Enter the postcode registered with Royal Mail for receiving invoices.
|
| Alias* | Enter a custom name which can be used in the API request instead of using the shipping account ID when connecting to us. Therefore, it is recommended that this name must be memorable and available for reference purposes. |
| Contact Name* | Enter the contact name for the account you are adding. |
| Contact Number* | Enter the contact number for the account you are adding. |
- In the CARRIER DETAILS block, enter the necessary information as explained in the following table.
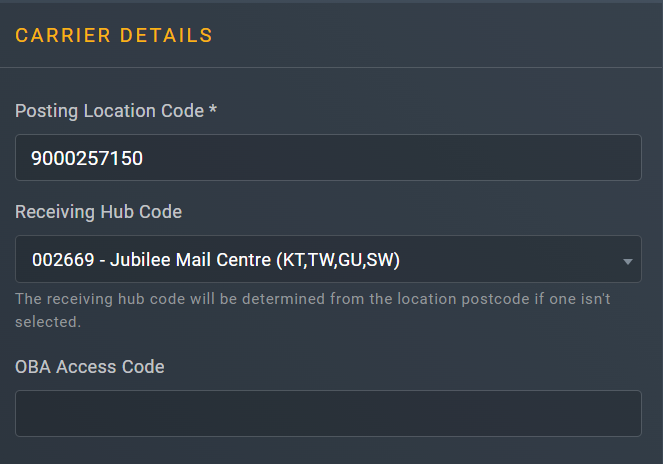
Entering carrier details
| Element | Description |
|---|---|
| Posting Location Code* | This is a Royal Mail specific code given for each location you are despatching shipments from. This must be a 10 digit number that always starts with 9000. For example, 9000257150. |
| Receiving Hub Code* | Enter the code allocated by Royal Mail for the receiving Hub to where your goods will be taken. The Receiving Hub Code is automatically populated based on the postcode of the shipping location to which you are linking this account. |
| OBA Access Code | This field is autopopulated by INTERSOFT and is something we communicate directly with the carrier after the shipping account has been added. |
- After entering all the required information, select .

Once done, you have now successfully added a shipping account. Once the account is approved, you can now start shipping with it.
NoteShipping account(s) can be added and managed via API. For more information, refer to theAPI References section.
See also
Updated 19 days ago